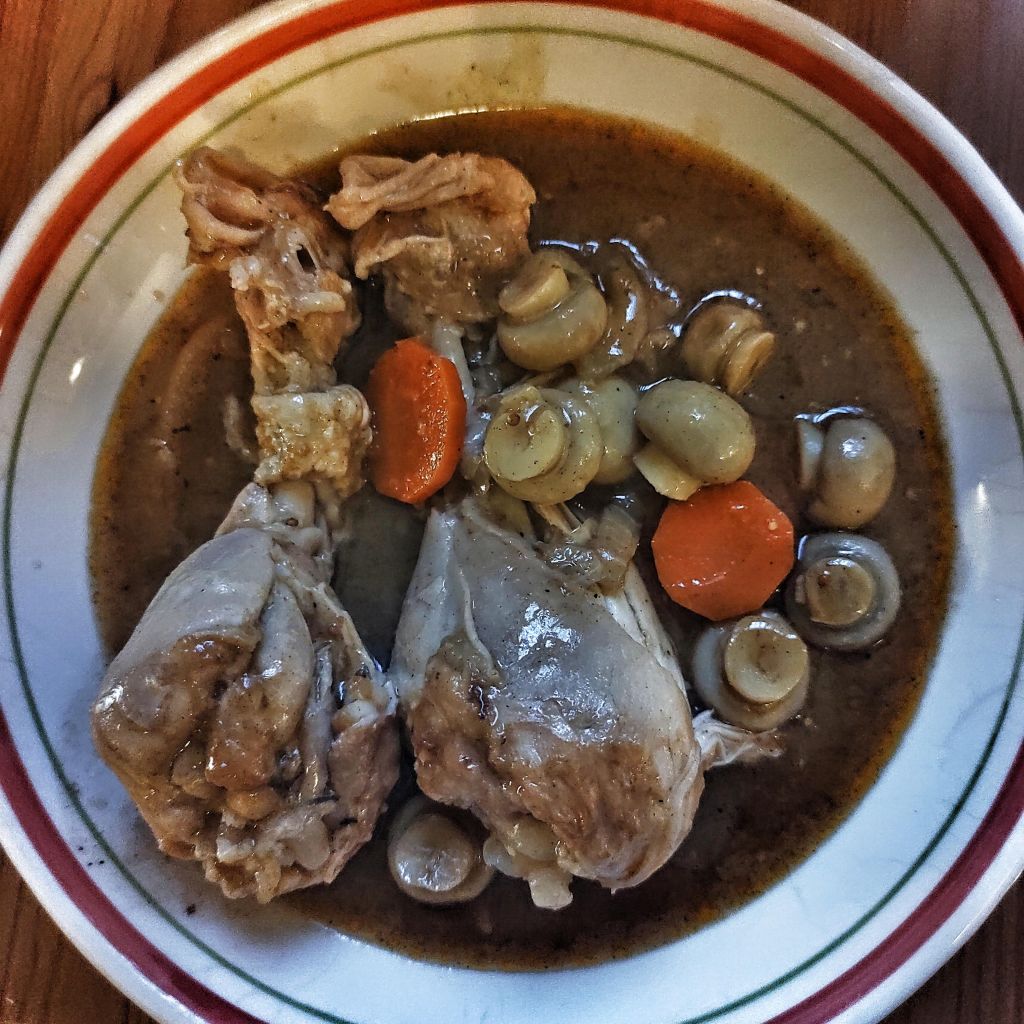
Peasant food. ¡Olé!

This isn’t Spanish, but it’s nice to pretend it’s Spanish peasant food. It’s braised chicken with chorizo, potatoes, and beans in a tomato broth It does take a little while to make, but it’s not difficult, and spending time preparing it is perfect for businessmen who have spent the day in the city destroying each other’s reputations to take their minds off things for a little while.

Serves 4, generously, and will stretch to 6.

Ingredients

  • 1 whole chicken (medium size)
  • 2 chorizo sausages, chopped into discs
  • 1 large carrot, diced
  • 2 sticks celery, diced
  • 1 medium onion, diced
  • 2 cloves garlic, chopped
  • 3 medium potatoes, roughly chopped
  • 1 red pepper/capsicum (call it what you will), chopped
  • 1 400g can diced tomatoes
  • 2 400g cans cannellini beans or butter beans, drained but not rinsed
  • 1 tsp dried mixed herbs
  • A few strands of saffron (optional, and leave out if your purse doesn’t stretch to such extravagance)
  • Chicken stock (from a cube) – about 500ml

You’ll need a 4L flameproof casserole or a cooking pot that you can place over direct heat.

Method

Begin by jointing the chicken. If you really can’t cope with the idea, you could use 6 chicken thigh cutlets instead, but jointing a chicken isn’t difficult, and it’s far more economical. I cut it up to end up with two breasts, two thighs, two drumsticks, and two wings.

Next, warm a little olive oil (or whatever oil you have) in the casserole over a medium heat and toss in the chorizo. Let this cook for about ten minutes, until the golden paprika oil from the chorizo is released, and the edges of the sausage start to brown. Then, with a slotted spoon, remove the chorizo to a plate and turn up the heat.

Now brown the chicken pieces in batches – around 2-3 minutes on each side. Don’t worry about getting crispy skin; it’s all going to be in liquid in the end, so it won’t stay crispy. After each batch of chicken is nice and brown, remove the pieces to a plate and set aside. Turn the heat back down to medium-low.

Now, add the carrot, celery, onion, and garlic into the pot, and soften these for around ten minutes, stirring occasionally. Then begin building!

Return the chorizo to the pot, followed by the potatoes, and stir everything together. Arrange the chicken on top of that before pouring on the tomatoes. Next, tumble in the beans, followed by the capsicum/pepper, herbs, and saffron. If you need to, wiggle everything around with a spoon so it all fits. Then pour in the stock – only as much as you need to barely cover everything. You won’t be able to really stir everything, but another few wiggles with a spoon should be enough to get everything conbined.

Now turn the heat down to low, stick a lid on the pot, and let it hang out, bubbling gently, for about an hour. If you feel the sauce needs thickening, you can make a slurry with some cornflour or potato starch and water and add that at around 45 minutes.

You can serve it on its own in bowls, but a couple of hunks of good bread to mop up the sauce wouldn’t be the worst thing in the world.

¡Buen Appetito!

Beanz Meanz Snagz!

This dish of pork sausages with Brussels sprouts and cannellini beans in a hot balsamic vinaigrette was a really simple midweek dinner that I chucked together the other night, and that I didn’t think was particularly impressive. However, the photo got a lot of likes on Twitter and Instagram, and (perhaps more importantly) it was especially delicious, and really felt rather fancy. I realise that it actually was impressive; it just wasn’t complicated. I’m looking forward to making this again for Adrian, but in the meantime, I’ll share here how I made it so that you can enjoy it too!

Serves 2

Ingredients

  • 6 nice fat pork sausages (you can use beef or chicken sausages if you don’t eat pork, or plant-based sausages if you don’t eat meat at all)
  • 250 g Brussels sprouts, washed (and trimmed if necessary)
  • 400 g can of cannellini beans (white beans, haricot beans etc), drained and, if you can be bothered, rinsed
  • 3 tbsp olive oil (not extra virgin, unless it’s all you have)
  • 1 – 2 tbsp balsamic vinegar
  • 1 tsp dried mixed herbs (optional)
  • salt and freshly ground black pepper

What to do

Preheat the oven to 220C (200C if you have a fan oven, gas mark 7 if you have a gas oven, 425F if you live in America, which I don’t recommend, but I’m aware some of you have little choice in the matter).

Start with the balsamic vinaigrette. In a bowl, dissolve the salt in the vinegar, along with the black pepper and herbs (they won’t dissolve, but chuck ’em in now anyway), before whisking in the olive oil to form an emulsion. Tip in the beans and the sprouts and toss them until everything is nicely coated with the oil and vinegar emulsion.

Then tumble that mixture into a baking pan (mine is about 24 cm square, but the size isn’t that important), and spread it so that it’s more or less a single layer, and sit the sausages on top before putting it in the preheated oven to bake for 35 minutes.

Then, well, eat it!

Balsamic Brussels Sprouts

Last night we had a pretty simple dinner: some rump steak with vegetables and potatoes. But I think even with simple fayre, it’s important for it to be delicious, and so I dressed the stir-fried sprouts in a hot balsamic vinaigrette. They were very excellent. Here’s how I did it.

Serves 2

Ingredients

150 g Brussels sprouts
1 tablespoon rice bran oil
2 pudding spoons olive oil
3 pudding spoons balsamic vinegar
Salt and black pepper

Begin by bringing a pot of water to the boil and adding some salt. While waiting for the water to boil, slice the sprouts in half lengthways, then add them to the water and boil for four minutes (you could steam them for four minutes instead, but I used the same water to parboil potatoes, so it made more sense to boil them).

While the sprouts are boiling, whisk together the olive oil and balsamic vinegar with a good pinch of salt and a grinding of black pepper until you have an emulsion. Don’t stress about how emulsified it is: you’ll have to whisk it again anyway. Then set a wok of an appropriate size over a high heat (if you don’t know what an appropriate size is, I’m going to assume you only have one wok, so use that one. If you don’t have a wok, you can use a big frying pan).

Once the sprouts have had their four minutes, drain then and let all the steam come off them. You want them reasonably dry. Then heat the rice bran oil (or any oil you have really) in the wok, and add the sprouts. Stir fry them for about two or three minutes or until they start to go a bit black (but stop before they turn to charcoal), and then pour in the vinaigrette (after giving it a final quick whisk). Continue to toss the sprouts about until the vinaigrette has bubbled and reduced and turned a bit syrupy. Add some more salt and pepper if it needs it, then tip the whole lot out onto a warmed serving plate, and serve immediately.

Coq au vin when you can’t be arsed

Adrian bought some chicken drumsticks yesterday and asked me to cook them. The think that came to mind was coq au vin, but I really couldn’t be bothered, so I threw something together with stuff I had in the fridge and pantry that sort of resembled a kind of coq au vin, but I’m sure traditionalists would be horrified. I don’t care.

Serves 4

8 chicken drumsticks
1 bottle white wine
4 large-ish carrots
1 large onion
200 g button mushrooms
a couple of cloves of garlic
3 tbsp flour
50 g tomato paste
1 pudding spoon Dijon mustard
1 pudding spoon grain mustard
250 ml chicken stock
thyme, 2 tsp dried or a couple of sprigs fresh
a bay leaf or two if you think it’ll make a difference
salt and pepper

Begin by peeling the carrots and chopping them into medallions. How thick you cut them is up to you, but mine ended up about half a centimetre thick. Then slice the onion into half moons. Brush the mushrooms if you like, but I couldn’t be bothered; a little dirt won’t hurt anyone, I thought as I was tossing them in, but I also remembered a TikTok I watched the other day that said button mushrooms are best grown on pig manure. Anyway, I digress. Brush them or don’t brush them: it’s up to you.

Put the flour into a big freezer bag (or whatever plastic bag you have) along with some salt and pepper. Don’t be shy with the salt and pepper: this is not ritual magic; we want to create a good flavour. Then put the chicken drumsticks in and give it all a good shake until the chicken’s coated with the seasoned flour.

Then, in a nice big pot over a fairly high heat, and into which you’ve warmed some oil, brown the chicken in batches before removing it to a plate. Get it nice and brown. Set your smoke alarm off. I did.

After that, turn the heat down and tumble in the onions, and fry them for about five minutes or until they’re starting to go a bit brown. Then add the garlic, which you have chopped or minced if you had the energy, or merely peeled if you didn’t, along with the carrots. Soften and stir for another few minutes. How many minutes depends on your patience. My patience lasted three minutes, but I wish it had lasted five.

Next, put the tomato paste and mustard in and stir everything together before adding whatever flour was left in the freezer bag, stirring to blend everything together. Then return the chicken to the pot, again stirring so everything gets coated.

Wine time now! Pour in the wine. All of it. And add the stock too. If you drank a glass of the wine while you were cooking, and I don’t blame you if you did, add more stock. Just make sure everything’s just about covered with liquid. Then add the mushrooms, thyme, and bay leaves, stir again. Now is also the time to check the ingredients list and add anything you forgot.

Put a lid on and bring it up to a nice boil. Then turn the heat down to low, and simmer it gently for an hour and a half. Take the lid off halfway through if you remember.

I served it with steamed bok choy, but mashed potato would be nice too.

Oat and Lentil porridge

Porridge is excellent for breakfast, or for particularly lazy lunches or dinners. Here’s my favorite version which is delicious and very filling! You can try doing this in the microwave, I suppose, but I don’t think it would be as nice, and you’ll need a very big bowl so it doesn’t boil over or explode.

Serves one.

Ingredients

  • 1/3 cup oats (preferably not instant oats)
  • 1/3 cup lentils (green or red, but I prefer green)
  • 1 stock cube (I use the chicken-style vegan ones, but use whatever you like)
  • 1 tbsp grated parmesan cheese (or nutritional yeast)
  • pinch salt
  • freshly ground black pepper

Method

Put the oats and lentils in a saucepan with a cup and two thirds of water (or in any case a ratio of oats/lentils to water of 2:5) along with the stock cube, and then put it on a really low heat. Bring it up to a simmer (it’ll be quicker if you put a lid on) and then let it simmer partially covered for 20 minutes if you’re using red lentils, or 30 minutes if your’re using green lentils, or however long it takes to get the consistency you prefer. Make sure to stir it every now and then, and scrape the lentils that have stuck to the bottom of the pan (if you’ve used a non-stick pan, which I don’t recommend, you’ll need to try your best with a plastic or wooden implement, but you’ll have a much easier time if you have a pan that isn’t non-stick and a metal spoon).

About five minutes before the end of the cooking time, add the cheese (or yeast), a pinch of salt, and a good grinding of black pepper, and when it’s done, well, you eat it!

Spaghetti with a mushroom ragu for two

This is a delightful little dish that’s simple and fairly quick to make. You can use fresh mushrooms, but I suggest using dried because they are cheaper, have much more flavor, and you can use the soaking liquor for the stock. If you do choose to use fresh mushrooms, then use vegetable stock. Chicken or chicken-style vegan stock will overpower the flavor of the mushrooms.

For the mushrooms, I used a mixture of shiitake, button, cep, and black fungus, but I don’t think the black fungus worked all that well (except for giving the dish a dramatic look!). I think dried mushrooms are excellent, but if you do use fresh, you’ll need about five times the weight. If you use nice mushrooms, that’ll be expensive, but you might be rich so you do you. Either way, don’t bother using just baby button mushrooms, and certainly don’t use oyster mushrooms because your sauce will taste of nothing.

It serves two people. Or one person twice.

Ingredients

  • 50 g dried mushrooms
  • Olive oil (about twice as much as you think you’ll need, but not so much that you’ll be deep frying)
  • 1 onion (or a couple of banana shallots would be nice)
  • 2 fat cloves of garlic, minced (or two big dollops out of a jar)
  • 60 ml or so of vermouth, or whatever you have – sherry, Madeira, Marsala etc.
  • 2 tbsp thickened cream (double cream in the UK, heavy cream in America)
  • Some basil, parsley, and parmesan cheese (as much as you like of each)
  • 250 g spaghetti (I use Barilla no. 7 spaghettoni)

Method

Begin by soaking the mushrooms in warm water for about half an hour (you’re going to ask me how much water to use: use enough to cover them in whatever vessel you’re soaking them in, and in any case at least 300 ml to 400 ml, but not too much, otherwise the lovely stock will be too weak.) While they are soaking, chop the onion and have a glass of wine. Add the chopped onion and garlic along with a good pinch of salt to the oil in a large frying pan, but don’t put it on the heat yet.

Once the mushrooms are rehydrated, drain and chop them, reserving 250 ml of the soaking liquor.

Now put the frying pan on a medium-ish heat and soften the onion, not until it’s brown, but until it’s really soft; it’ll take five to ten minutes, depending on the heat, but don’t be tempted to turn the heat up to rush it.

Next, add the mushrooms to the pan, and grind in some black pepper. If it’s a special occasion, you could grate in some nutmeg too – mushrooms love nutmeg. Cook the mushrooms over a fairly high heat until they are tender and any liquid that went in with them has evaporated.

Now pour in the vermouth (or whatever you are using) and allow that to evaporate too (it’s flavor we’re after here; we’re not making soup). Then pour in the reserved soaking liquor (or if you used fresh mushrooms, add 250 ml vegetable stock or something with an inoffensive amount of flavor). Turn the heat down to low, and simmer for about half an hour – until the liquid has reduced by about half and it’s thickened up.

While all that’s going on, bring a large pot of water to the boil and add a frightening amount of salt (like, I grab a handful of rock salt and throw it in), add the pasta and cook it for one minute less than it tells you on the packet, unless you’ve got dentures you’re worried about, then add some extra time so it all goes soft. Time it all so that the pasta will not be sitting around waiting for the sauce.

After the sauce has been cooking for half an hour and has reduced sufficiently, add the herbs and the cream (you can use more or less cream, depending on your taste, but don’t drown out the taste of the mushrooms, and remember you’re not making soup!). Bring it back up to a simmer (it shouldn’t curdle, unless you’ve used reduced fat cream for some reason, though I can’t imagine why you would). Then immediately drain the pasta and add it to the pan, mix it all together thoroughly, then serve onto warmed plates. Sprinkle over some grated parmesan cheese (or shaved if you’re trying to impress).

Enjoy!


Vegan Chili

I like vegetarian cooking, but have long had a problem with vegetarian chili, and in particular the texture. Without overcooking the beans and vegetables it’s always seemed like a spicy vegetable and bean soup. A friend suggested blending it a bit with a stick blender. I loved it!

Serves 4 hungry people, or 6 people whose appetites are smaller

Ingredients

  • Oil (I used sunflower oil, but olive oil is good too.)
  • 1 onion (I used a red onion, but a brown onion would be just as good)
  • 1 red capsicum
  • 2 carrots (on the larger size, but not the tree-trunk sized ones)
  • 2 sticks of celery
  • 3 fat cloves of garlic (or three big dollops of already-crushed garlic from a jar)
  • About a heaped pudding spoonful of ground cayenne pepper (be bold; trust me)
  • Ground cumin, more than a teaspoon, less than a tablespoon
  • Ground smoked paprika, about the same amount as the cumin
  • 1 teaspoon mixed Italian herbs (I know, it sounds ridic, but it works)
  • A good heaped tablespoon of cocoa powder (NOT drinking chocolate)
  • 2 400 g cans of chopped tomatoes
  • 2 400 g cans of beans (I used Woolworths Mexican Beans mix, which is a mix of kidney beans, pinto beans, and black beans but you can use any beans you like)
  • 1 400 g can of sweetcorn kernels (or you can use frozen if you have some in the freezer)
  • 400 ml vegetable stock (I used stock powder and an empty tomato can full of hot water)
  • A few drops of Tabasco sauce (enough to put the willies up you a bit, but not so much you’re genuinely afraid)
  • Splash of white wine vinegar

Note: try to get the “no added salt” version of the canned stuff; it’ll taste better.

Method

Chop up the capsicum, carrots and celery and dice the onion. Warm the oil in a big saucepan or pot or casserole or something (I used the 3 litre Ikea 365+ pot, which was a bit snug, and I reckon the 5-litre one would have been better) and toss in the chopped vegetables. Keep the heat low and turn them over in the oil before putting a lid on. Stir them every now and then and after about fifteen minutes they should be tender. If not, leave them a bit longer, but you don’t want them mushy; just tender.

Now turn up the heat and put in the garlic, the spices and the herbs stirring to combine, and then add the cocoa powder. Stir that in too: it will combine with the oil and vegetable juices and go lovely and glossy – that’s when it’s time to add the tomatoes, drained beans, and drained corn, as well as the stock (or water and stock powder). Use the stock too rinse out the tomato cans. Stir it all together and bring it up to a simmer.

Once it’s simmering, turn the heat down so it’s simmering gently and let it cook for about half an hour, stirring occasionally and making sure nothing’s sticking to the bottom.

After half an hour add salt and pepper to taste (if you add salt before you cook the beans they’ll end up tasting of nothing – that’s also why I recommending using cans with no added salt).

Now take it off the heat and leave it to cool down for a couple of minutes. It won’t get cold. Use a stick blender to give it a bit of a whizz – just a couple of pulses, but don’t go crazy: you’re not making soup. If you don’t have a stick blender (and honestly, if you don’t you really should get one, and a decent one – the best you can afford) you can put a couple of ladlefuls into an ordinary blender and whizzy whizzy before adding it back to the pot (and if you don’t have any kind of blender you could put a couple of ladlefuls through a mouli, or go at it with a potato masher, but I really do recommend doing something to get the contrasting textures).

Finally stir in a splash of white wine vinegar, check the seasoning and serve! I put some slices of avocado on top and it was delicious. I often put broken tortilla chips on chili too, and, while I don’t really like it, a lot of people put corriander leaves on the top. A dollop of sour cream and that grated Monterrey Jack cheese is nice if you’re not concerned about it not being vegan

Kedgeree with smoked herrings

Kedgeree is great. It’s a breakfast dish but you can have it any time. It’s quick and easy and a very good recipe for one, but it is also good when you have an overnight guest who you want to impress with breakfast, and because my version mostly uses tinned ingredients, it’s an ideal camping dish.

This recipe serves one.

Ingredients

  • 200 g can of smoked herrings (in brine, please; not tomato sauce)
  • 60 ml basmati rice (or any long-grain rice, but I insist on basmati)
  • half an onion, diced (I use already diced frozen onions)
  • half a small can of mushrooms (I like the ones in butter sauce)
  • One hard boiled egg, roughly chopped
  • A big pinch of curry powder (I use Clive of India Hot curry powder – this is an outrageous colonial dish after all!)
  • About half a teaspoon of turmeric, for color
  • Salt and pepper
  • Butter

Method

In a small-ish frying pan over a medium heat, fry the onion in butter until it is soft and slightly brown, then turn the heat up to high. Stir in the curry powder and the turmeric until it’s combined with the butter and coated the onions, then add the rice to the pan. You want to toast the rice for about a minute, and keep it moving so that the rice picks up the color and flavor of the curry powder.

Once everything is a lovely orange color and nicely fragrant, pour in 180 ml water and bring to the boil. Once it’s boiling, cover the pan (if you haven’t got a lid that fits, just use foil), turn the heat right down and let it barely simmer for about fifteen minutes, or until the water has been absorbed and the rice is cooked.

In the meantime, pour yourself a glass of wine (if you are making this for lunch or dinner) or champagne (if you are making this for breakfast) and take some photos of the cooking process for your Instagram.

Once the rice is cooked, fluff it up a bit with a wooden fork (I had trouble finding a wooden fork in Sydney when I first moved here, and was even told by a shop assistant in a cookware shop that they did not exist and I had conjured up the concept of a wooden fork in my head, but it turns out that someone at Ikea also conjured up the concept of a wooden fork in their head, so you can get one there). Use the wooden fork to break up the herring fillets (which you have drained, of course!) a bit, but not too much because you want chunks rather than flakes, and stir the into the rice, along with the chopped egg and the mushrooms. Do it gently otherwise you’ll break up the fish and egg too much and you’ll end up with mush. Just turn it over with the fork until everything is combined and heated through. Season with salt and pepper. I’m an absolute fiend for salt, but you probably won’t need that much because of the herrings.

If you’re doing this for Instagram, and are particularly interested in likes and comments, then this looks nice sprinkled with some cayenne pepper (I don’t do this because I don’t like the flavor) and some parsley arranged on the top (you could use coriander, of course, which might be a better flavor combination, but wouldn’t be in the spirit of colonial cuisine).

Then, of course, you eat it.

Notes

If you want a vegetarian version, leave out the fish and double the mushrooms, and you could maybe use some lentils or some smoked firm tofu or tempeh or something that will have a bit of a bite and a smoky or smoke-adjacent flavor. If you want a vegan version do that and leave out the egg (and use some kind of vegetable oil or other instead of the butter).

If you’re making this for more than one person (which you probably are if, as suggested, you’re making this for breakfast to impress last night’s shag your overnight guest), then increase the quantities of everything accordingly (use a 1:3 ratio of rice to water), and serve it on a platter, rather than individually, so people can help themselves.

follow me on twitter @supercroup 


Pea & garlic soup

I make this soup from time to time because it’s really quick and easy to make (it takes ten minutes!), it’s super cheap, and – most importantly – it’s delicious. I think it’s a perfect weekend lunch for one.

Every ingredient – except for the peas – is optional, and I never go out and buy anything specifically to make this, so it’s very much a storecupboard recipe.

Ingredients

  • 1 cup frozen peas
  • 1 small clove garlic, minced
  • 1/2 tsp vegetable stock powder (optional)
  • 1 tsp extra virgin olive oil
  • 1 tsp balsamic vinegar

Put the peas and the garlic in a small saucepan with the stock powder; cover with boiling water from the kettle so the peas are just covered. Simmer for 7-8 minutes before blending in a blender with a slug of olive oil and a decent drizzling of balsamic vinegar. Season well with salt and pepper, then eat it immediately.

(Serves one)

Tea Party for One

Originally posted on Six Months in Sydney

In a previous post I discussed my love of tea, and what is the perfect accompaniment to tea? Biscuits, of course! Dunkable or otherwise, a cup of tea and a biscuit is always delightful. Happily, that is equally true in Britain and Australia: tea and biscuits. I suppose it does make sense, rather than being an English curiosity. Even more happily, the blends of tea that are available are pretty much the same: English Breakfast (and the similar (and I hope ironically named) Australian Afternoon), Earl Grey etc.

However, the varieties of biscuits are vastly different. I’ll be blunt: I don’t really like Australian biscuits (bar a couple). I’m not sure if that’s because I genuinely don’t like them, or if it’s because I miss my beloved English biscuits. I suspect it’s a bit of both, but in any case I thought I’d try to find out with a scientific* experiment.

Before we get to the details of the experiment, however, a run down of some of my favourite biscuits that are available in England, but not here.

English Biscuits

rich tea

Rich Tea

Rich tea biscuits are very, very boring, and are the staple English biscuit. My Grandma always had these biscuits, and that’s probably the only reason I like them. They’re not all that good for dunking because they fall apart and collect in the bottom of the tea cup, but if you do manage to get a decent dunk, they soak up the flavour of the tea, and this the only way to make them even vaguely enjoyable.

There is a type of biscuit called Rich Tea available in Australia. These biscuits are quite different, and I discuss these below.

hobnob

Hob Nobs

Hob Nobs are made by McVities, and they are the most amazing things in existence. Obviously, the only ones worth eating are chocolate Hob Nobs. They’re oaty and crunchy and delicious. In L.A. I was willing to pay up to $12 for a packet of Hob Nobs. Alas, they are not available in supermarkets here, and I’m not prepared to go in search of a British shop, so I have to go without.

Pink Wafers

Wafer biscuits are available here: vanilla wafers, chocolate wafers, and strawberry wafers. What is not available, however, are pink wafers: those wafer finger sandwiches with cream in the middle. They are bright pink and don’t seem to have any actual flavour other than simply pink. I remember them from play school, and I think that perhaps they are children’s biscuits, but sometimes children’s biscuits are the best! Which leads me to…

party rings

Party Rings!

Oh yes! These are brilliant. They are definitely children’s biscuits because, well look at them. The main ingredient is, I think, food colouring, followed my sugar and then more food colouring. They come in a variety of flavours: pink, yellow, pinky-purple and fluorescent brown.

in essence, the actual biscuit is crap. It’s a very plain biscuit, but it is the brightly-coloured icing that makes them awesome. Definitely for children’s parties, but also a favourite at parties I went to as a student. I love the retro 80’s feel of these. But they just don’t exist here. People are also a little horrified when I describe them. I can’t imagine why.

Bourbons

I won’t go into too much detail, because these are a very basic chocolate sandwich biscuit. Similar things are available here, but they’re not called bourbons, and I think it is the name, rather than the actual biscuit I like.

The Scientific* Experiment

Okay, so not really a scientific experiment, but rather an afternoon session of me sitting and eating biscuits. Now, I did actually do it properly: I put out the biscuits on a nice plate, made a pot of tea, and tested each one, considering flavour, crunch and dunkability.

Shopping

A Packets

Arnott’s in Australia is basically what McVitie’s is in the UK. Now for this experiment, I splurged a bit and I bought Arnott’s. I could have got Woolworth’s own-brand, but I figure these wouldn’t have been as good, and I might have been accused of not conducting the test fairly. I also bought a pack of Anzac biscuits made in-house by Woolworth’s, and Rich Teas by Paradise biscuits, as Arnott’s rich tea either don’t exist, or aren’t available in my local Woolie’s.

The Party

B Plated upC Ready to Go

Like I said, I put the biscuits on a plate, as civilized people do, made a pot of tea (Yorkshire Tea, of course!), and sat down and started eating. Actually, it seemed rather daunting, the sight of all those biscuits, and knowing that I was going to have to eat them all. But first, a cup of tea to warm up my biscuit-eating muscles.

01 Tea

The Plain Biscuits

Nice and Milk Arrowroot

02 nice03 arrowroot

Nice aren’t particularly Australian, but they were included in the family pack of biscuits that I bought, so I thought I’d try them. They’re plain, but with a pleasing crunch. They dunk well, and the sweetness comes out when dunked.

Milk Arrowroots are very much like English Rich Teas, although they are oval instead of circular. They fall apart when dunked, and are an excellent option for a soggy biscuit.

04 choc ripple

Choc Ripple

Just a plain chocolate biscuit, with quite a nice texture. A good chocolate flavour, but it does not dunk well. I think it would probably dunk better in coffee, but the biscuit spoils the taste of the tea, and the tea spoils the taste of the biscuit.

This one definitely tasted chocolatey, which is unusual for commercially-produced chocolate biscuits that don’t have a chocolate coating or chocolate cream.

05 scotch

Scotch Finger

I don’t like Scotch Fingers really. They’re definitely Australian though. Essentially, they’re a shortbread biscuit, but not not nice like Scottish ones. These are very dense, and when chewed they sort of clump together in your mouth.

Sadly, they didn’t pass the dunk test either. There was no improvement to either texture or flavour by dunking in tea.

05 scotch dunk

06 teddy bear

Teddy Bears

A very disappointing biscuit. This is clearly a children’s biscuit, and going on this one might think that Australians do not like children or want them to have fun. This doesn’t even come close to the Party Ring or even the Pink Wafer. It is very plain, hardly even sweet. It’s an unpleasant dunker, falling apart quickly and finding itself at the bottom of the cup.

07 butternut snap

Butternut Snap

Now these are very nice biscuits. They come close, but not quite close enough, to Hob Nobs. They have a really good crunch and oaty texture, with a very smooth, buttery flavour. They dunk well (and from experience I know they dunk really well in coffee), and they hold their texture when dunked.

Milk Coffee & Rich Tea

09 milk coffee12rich tea

There is not much good to say about either of these biscuits. The milk coffee is very very plain, much like the teddy bear, but without even a fun shape. It totally disintegrated when I dunked it, and I had to fish out bits of it with a teaspoon.

The Australian version of the Rich Tea is very odd indeed. It’s completely different from the English biscuit. The texture is that of a tougher arrowroot, but it has a horrible orangey flavour that becomes really quite bitter, and dunking only makes it worse. It’s dotted with chewy currants too, which are really quite nasty. I will not be buying these again.

11 anzac

The Anzac Biscuit

Anzac biscuits are most definitely Australian, and they are gorgeous! The texture is chewy, but oaty, and they have a really good buttery flavour. They’re made with coconut, but the ones I had today didn’t really have a flavour of coconut. They are, however, still delicious.

Australia may produce some dodgy biscuits that make me pine for a Fox’s selection tin, but all is forgiven with the Anzac biscuit.

The Cream Biscuits

10 timtam

Tim Tams

I first heard about Tim Tams in 2009, and had an American licensed version of them shortly afterwards. They are really really nice, and not liking them is unAustralian apparently.

The thing they most compare to in the UK is the Penguin, although the actual biscuit part of Tim Tams is quite a bit softer, and the cream creamier. The only negative I have to add is that the chocolate is a little too sugary, but I should bear in mind that I had by this point already eaten a lot of biscuits, so my mouth was likely FULL of dissolved sugar.

Monte Carlo & Delta Cream

13 monte carlo16 delta open

The Monte Carlo is really nice. It looks crunchy, but really it isn’t. The cream is almost marshmallowy, and the raspberry jam around the outside of the cream is a really nice surprise. The Delta Cream is a lot like an Oreo, but not as chocolatey. Actually it’s not chocolatey at all. The cream is also very sugary, and although it is supposed to be vanilla cream, it doesn’t have any flavour at all. Disappointing.

14 orange slice

Orange Slice

Now, I’m not really a lover of orange flavoured biscuits; it makes no sense to me, so it’s not surprising that I didn’t like these. That said, the orange flavour was not very strong. The biscuit had no real crunch either. A really disappointing biscuit.

17 kingston

Kingston

The Kingston is a really very pleasant biscuit. It’s very much like two butternut snaps with chocolate cream in the middle.

The biscuit has a really good crunch and a pleasant oaty texture, and the chocolate cream was a nice surprise. It wasn’t that hard, flavourless chocolate cream, but rather almost like gooey melted chocolate. I could eat lots of these biscuits!

19 more munching

Shortbread Creams

Honestly, these are horrible. They have no flavour whatsoever, and the texture is not pleasant. The shortbread is like soft sand, and lacks that buttery flavour that Scottish shortbread has. The cream is sugary, but has no clear flavour.

I’ll be avoiding these.

The Conclusion

There are plenty of good things to say about biscuits in Australia, but I do miss my English favourites. My definite favourite out of all of these is the Anzac biscuit, but from the Arnott’s selection, either the butternut snap or the Kingston was in the top spot.

After all of these biscuits, I did feel rather sick, and I got a head rush from all the sugar, but I suppose it WAS in the name of research. And a tea party for one was a lot of fun!

follow me on twitter: @supercroup

Image credits:

Party rings photo:
http://commons.wikimedia.org/wiki/User:Mattbuck
mattbuck

Rich Tea (English) photo:
http://commons.wikimedia.org/wiki/User:Xyrael?uselang=en-gb
Sean Whitton

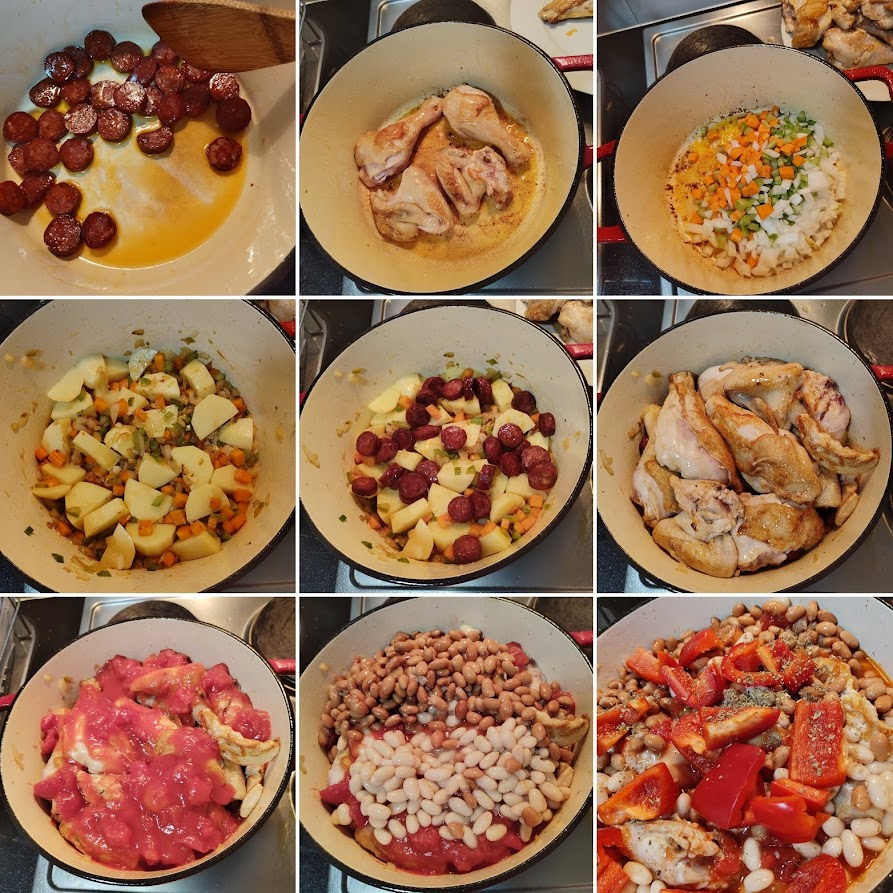
Chickpea & mushroom spiced stew

I threw this together last night because I was looking for something super-cheap, nutritious, and very tasty for dinner. It was successful on all counts: easy to make and it cost about $4 (AUD) to make. Aside from the onion, everything came out of cans or packets too, which makes it a perfect last-minute thing, and you could easily make it on a camping trip. Vegan & vegetarian friendly.

img_20160927_210625

Serves 4

Ingredients

  • 1 small onion, sliced into half moons
  • 2 cloves garlic, minced
  • 1 400 g can chickpeas
  • 1 400 g can whole champignons, drained
  • 2 400 g cans chopped tomatoes
  • 1/2 cup red lentils
  • 2 tsp ground ginger
  • 1 tsp ground turmeric
  • 2 tsp ground cumin
  • 2 tsp hot Madras curry powder
  • 1 tbsp canola oil or similar

Method

  • Over a medium heat soften the onion and garlic in the oil with a good pinch of salt for around ten minutes.
  • Turn the heat to high, add the curry powder and the spices, turning them over in the onion for about a minute until they become fragrant.
  • Pour in the tomatoes, and about a can’s worth of water, using it to rinse out the cans before adding.
  • Bring to the boil, then add the drained champignons, and the chickpeas with their brine
  • Turn the heat to medium-low and simmer uncovered for 20 minutes
  • Turn up the heat to medium-high add the lentils, simmering more robustly for a further 15-20 minutes until the sauce has thickened and the lentils have gone mushy. Scrape the bottom from time to time to ensure the lentils do not stick.

Serve with rice.

Steaks, sauces, and Delia Smith

This was originally published in 2012

Steak au poivre, peppered steak, steak with peppercorn sauce: call it what you will; it’s pretty much a culinary classic. I’m inclined to believe it is French because of its name, the use of flaming brandy and the French love of pouring rich, creamy sauces over anything that is put on a plate.

First a note about steak. Well a few notes actually. Rump, sirloin, and rib-eye are delicious cuts, full of flavor and so totally inappropriate to be cooked in a rich sauce like this one. Fillet is perfect: it is beautiful to cut, but needs a lot of help in the flavor department, and is an ideal cut to serve with rich, creamy sauces. It’s expensive, but one often deserves a treat! If you can afford fillet, buy good quality meat, and the steaks must be thick!

Secondly (and I mean this), I am very opinionated about how steaks should be cooked. My first opinion is that it is a shame to cook a steak at all. That said, for this dish cooking is necessary. The recipe below gives instructions on how to cook your steak if you like it rare. If you don’t like it rare, I wouldn’t bother to cook it at all: you will destroy the delicate texture of the fillet and will have wasted a lot of money on what is an expensive piece of meat.

The sauce is very rich and creamy, but hopefully the finished dish will not resemble what is so often served up in third-rate Italian restaurants; a glib bit of meat swimming in cream and brandy. Delia Smith’s version of this recipe includes no cream or brandy and is, although delicious, not nearly as indulgent as my version!

Steak au Poivre

Serves 4

4 fillet steaks
3 large shallots, finely chopped
2 cloves, chopped
4 tsp black peppercorns
75 ml brandy
200 ml red wine
400 ml good beef stock
90 ml double cream
2 tbsp butter

Begin by flash frying the steaks. I prefer to fry steak on a heavy cast iron griddle, but a large heavy-based frying pan is perfectly suitable. Get your griddle as hot as possible – heat it over a high heat for a good fifteen to twenty minutes. There will be smoke, but do not be afraid: an extremely high temperature is necessary. Spread a layer of butter over each steak (not the pan!) and lay butter-side down on the hot griddle and fry for one minute on each side, turning every thirty seconds. Remove the steaks to a warmed plate.

Next, over a medium heat, melt the rest of the butter in a large, thick-based frying pan (if you fried the steaks in a pan, use the same one). Add the shallots, garlic and peppercorns to the pan, and soften gently for about five minutes.

Now comes the tricky (and potentially dangerous) bit. Heat the brandy in either a large metal ladle or a very small saucepan. Once the brandy is hot, return the steaks to the frying pan, light the brandy with a match and (standing as far back as you can) pour the flaming brandy over the steaks. Swirl it around gently to keep the flame going as long as possible, but as soon as the flame dies, remove the steaks back to the plate.

Now add the red wine to the pan, turn the heat up to high and reduce the wine by about one half; this should take around five minutes. Next add the beef stock and let it boil for around ten minutes or until the stock has reduced by about two-thirds.

Now turn the heat back down to medium and stir in the cream. Allow the sauce to thicken a little and return the steaks to the pan to warm through. Spoon the sauce over the steaks. Once warmed through, serve immediately with grilled corn cobs and stir-fried savoy cabbage.

Note for readers in Australia/New Zealand. Fillet steak means eye fillet; shallots mean eshallots – the french shallots that look like small onions; not shallots that might also be called spring onions or scallions.

Pea Risotto with Chicken, Pancetta and Cep Mushrooms

A lot of people think that risotto is terribly difficult to make. But like most things that are commonly viewed as difficult, risotto is surprisingly easy. It does require patience and a lot of attention: turn your back for a moment and it could be ruined. But risotto is one of those dishes that is as comforting to cook as it is to eat. Rich, creamy and sensual, and you can definitely taste how much care has been put into the preparation.

The most important ingredient in any risotto is the stock, and here you can’t get away with using a stock cube as you so often can. The rice is cooked entirely in the stock and it will soak up the flavor, and stock cubes are notoriously lacking in real, wholesome flavor. That said, there are some options available if you haven’t made your own stock, and these include the concentrated jellies that you can buy, as well as ready-made stocks.

A note on stock: it is surprisingly easy to make. I use a lot of chicken stock, and I keep a bag of chicken bones in the freezer and keep adding to it. With planning, you can make your stock in advance (say, the night before) and keep it in the fridge, ready to use.

You can add anything you like to your risotto. It’s simply a base of arborio rice and onion cooked in stock, with whatever you fancy added at the end. In my mind, peas are mandatory, but it really is up to you!

Pea Risotto with Chicken, Pancetta and Cep Mushrooms

Serves 4

300 g arborio rice
700 ml home-made chicken stock, heated
1 large onion, finely chopped
2 cloves garlic
4 chicken thigh fillets, skin off
200 g cubetti de pancetta
1 small packet dried cep mushrooms
A handful of frozen peas
2 glasses white wine
A few sprigs of rosemary
1 bay leaf
2 tbsp butter
2 tbsp groundnut oil
Salt and pepper for seasoning

Heat a small amount of oil in a frying pan over a high heat and quickly seal the chicken thigh fillets on each side. You don’t want to brown them, just seal them so they don’t fall apart. Add one glass of the wine and enough stock to cover the chicken, together with the bay leaf and the rosemary. Lightly season with a little salt and pepper and bring to the boil. Cover with a lid and turn the heat right down, and simmer for 20 minutes, or until the chicken is cooked.

While the chicken is cooking, soak the mushrooms. Put them in a bowl and cover them with boiling water and leave to stand for ten minutes. Once the chicken thigh fillets are cooked, remove them with a slotted spoon, but retain the liquor, and reduce it to about 100 ml. Cut the chicken into small pieces.

In another large frying pan or saucepan, cook the pancetta over a high heat. There is enough fat in the pancetta, so you will not need to use any oil. transfer the pancetta to a plate and add 1 tbsp of the butter and 1 tbsp of the oil to the pan and turn the heat to medium. Fry the soaked mushrooms for a few minutes until they are cooked, and transfer them to the plate to join the pancetta and the cooked chicken.

Melt the rest of the butter in the same pan and turn the heat down to low. Add the onion and soften for about five minutes. Turn the heat back up to high and add the arborio rice, turning it over in the buttery juices. Toast it for two minutes or so, but don’t let it brown, then pour in the other glass of wine, and start stirring.

The trick now is to make sure the liquid is fully absorbed before adding any more. Rush, and you’ll end with soup. Once the wine has been absorbed, add the reduced liquor that the chicken was cooked in and turn down the heat a little. Keep stirring constantly. Again, allow the liquid to absorb fully, and you can start adding the hot stock. Add the stock a ladle-by-ladle and make sure to keep stirring. You don’t need to wait for the liquid to be absorbed completely, but you should wait until your spoon leaves a clear wake behind it before adding the next ladleful. It should take about 20 minutes to add all the stock.

By this time the risotto should be of a creamy consistency, and you can stir in the cooked chicken, pancetta and mushrooms. Season well and dot a few knobs of butter over the top before covering with a lid, or kitchen foil. Leave it to stand for five minutes to allow the flavors to intensify. Stir in the frozen peas (no need to cook them first) and allow to stand for another minute or so to allow the peas to warm through.

Serve immediately with a grating of Parmesan cheese and lots of freshly ground black pepper.